MAD ABOUT MOTIF
Pat Pauly
Equipment: (put your name on everything if you can)
Old clothes to wear, apron, rubber gloves
2 Table sized pieces of plastic – to wrap up wet pieces at the end of class
30” x 60” (used) cotton or polyester low-density batting to pad print table (or flat blanket)
4 washcloths or towels sized as washcloths for cleanup
Small high density foam paint roller 4-6”, optional large foam paint roller about 8”
3 Wide scrapers 4”– 6” –like Bondo brand putty scrapers (paint department of home store)
8 long handled spoons (approx. 10”) like kitchen baking size – to stir dye. NO Stir sticks!
Partial Roll of blue masking tape, roll duct tape for taping silkscreens
Two sharpie markers
8 yogurt or plastic food containers (quart size) with lids (tall, not shallow containers)
Scissors for cloth and paper, optional rotary cutter for paper or plastic
Notebook, pencil/pen, 6 sheets of copy paper
Camera, phone camera, or something to remember processes!
Optional if driving: One small 2-3 gallon bucket, Dust mask N95
Things for printing: 1-2 yards of string, thin plastic premade stencils, cutouts from plastic (under 1/16”). Please just bring a handful – not a boxful!
Notebook of ideas for motif IMPORTANT TO HAVE SOME READY See my Pinterest board https://www.pinterest.com/patpauly/motif-for-surface-design/
Silk screens 4 (or more) 16” x 20” or similar size. (order from Dick Blick http://www.dickblick.com/products/blick-cord-stretched-frame-with-110-monofilament-polyester-mesh/) or purchase $35 from Pat Pauly at the class. Try your luck, or send Pat an email to reserve patpaulyart@gmail.com
Fabric: 15 yards minimum, cut 5 in ½ yard pieces, leave 10 whole (feel free to bring more like 20 yards) of pfd 100% cotton. I order from Test Fabrics #419 or #400M. Call for prices and availability.
To prepare fabric for printing for this class: To see videos on my blog piecesanresistance.blogspot.com , search in the group of words at bottom of blog for “video” to see all the printing videos, and suggestions on how I soda soak.
Smooth by hand and fold. They do relax and are fairly flat. Don’t worry about wrinkles! We’ll talk about how to deal with that, so ironing isn’t necessary.
This is really important! BEFORE SODA SOAKING YOUR FABRIC (step 2) Sew tags with a sewing machine (not pinned or stapled) to your fabric with tyvek (old US mail envelopes, add in sharpie marker your first name and last initial. These tags should hang off one corner, can be larger than 3” x 4”, but not smaller.
Soda Soak. Make ahead of class, soda soak your fabric. In a large bucket add one gallon warm water to one cup sodium carbonate (soda ash), add fabric loosely (a few pieces at a time) to this solution and soak 15 minutes or more. Longer is ok, so chill! Also, please use gloves for anytime you handle soda soaked fabric, both wet and dry! The soda ash is corrosive to metals like aluminum, but doesn’t effect glass, plastic. It will dry your hands considerably, so wear gloves wet or dry.
Ring out by hand, hang on a line to dry, do not dry in dryer. Here’s a tip: after soaking, ring by hand slightly, then place in the bottom of a laundry tub or bathtub or shower, or similar (I’ve even used an empty bucket) to let “drain” for a while or overnight, and then when hanging up fabric there is a minimal drip of soda ash solution.
Light And Lacy
Valerie Goodwin
Equipment: (put your name on everything if you can)
Notebook and/or sketchbook
Pencil and/or pen
Sewing machine complete with a walking foot and a free motion foot. Some of you will choose to sew by machine, some by hand, some will prefer to fuse –I encourage you to consider all 3 options.
Small pair of very sharp Scissors for cutting fabric
Small pair of Scissors for cutting paper
Needles for hand sewing
Pins
An assortment of embroidery and quilting needles.
A variety of sew machine thread that you favor – including black, white and gray.
Any decorative threads that you like for hand sewing.
Thimble
Seam ripper
Inexpensive Flat artist Brushes: ranging in size from ¼” to 1” flat art brush
Inexpensive 2” (+/-) house painter’s brush
Medium sized Rotary Cutter
Gridded rotary cutter ruler
Inexpensive rubber gloves if you don’t like getting paint on your hands.
Teflon Sheet or parchment paper
A few plastic plates & cups as well as garbage bags.
1 yd of Misty- Fuse WHITE (www.mistyfuse.com)
Although white silk organza is part of the class fee please bring additional silk organza – a few half yards of colors that you like.
Polyester silk organza is not recommended. Allow for shipping time. They can be bought from:
http://www.voguefabricsstore.com/Silk-Organza-Fabric/
https://www.denverfabrics.com/c1030_apparel-fabric-silk-fabrics-silk-organza
https://www.thaisilks.com//index.php?cPath=1_11
http://www.etsy.com/ (please do a search – etsy vendors oftentimes sell them)
Opaque Fabric scraps — Pick any colors that you like. You may want to consider using:
Varied commercial or hand dyed solid fabrics.
Marbled fabric
Fabric w/ subtle prints.
Kimono Scraps
EXTREMELY OPTIONAL (ONLY IF YOU ALREADY HAVE THIS):
• An IPad with the “Procreate” graphics editor app + Apple Pencil and/or
Lap Top with Adobe Illustrator
• Flash Drive
NOTE: This is mainly a hands-on — NOT a tech workshop. The items above are
listed for those who want a little instruction how to use these programs.
DESIGNING FROM PHOTO TO IMAGINATION
Vicki Conley
Equipment: (put your name on everything if you can)
A selection of photos printed out 8.5 x 11
IPad or another tablet (optional)
Sketch book – no lines.
Pencil with eraser and Black Sharpies, fine point and regular point.
Tracing paper and Scotch tape
Parchment paper
Freezer Paper
Iron /ironing surface.
Small mat and rotary cutter and ruler
Xacto knife or craft knife with new sharp blade.
Scissors – fabric and paper
Colored pencils – NOT water soluble
Elmer’s washable glue stick disappearing purple (small not the fat one)) (2-3)
Design wall or Foam core design board 20 x 30 (available at craft stores)
Light box- this one is a great value.
Sewing machine that does zigzag stitch. (if you want to bring a Featherweight you can do the zig zag stitching when you get home)
Small sewing machine needles Microtex sharp 60/8 or 70/10 recommended for invisible zigzag, and average piecing needle.
Seam ripper and pins.
Optional Appliquick Tools
https://www.amazon.com/Apliquick-Rods-Tools-Turned-Applique/dp/B07CGGK68Z
Stiletto
Piecing thread
Invisible clear thread – polyester –NOT nylon (Superior Monopoly or Sulky Poly) Both available on Amazon
To achieve a bold poster style solids or gradation solids are best. Various fabrics for your chosen landscape – lights mediums and darks. About 1 yard of gradation blue fabric for the sky. (Or 4 different values of blue solids)
Fabrics for the small mini rock quilt. They can be wild colors if you want.
Floriani Stitch N Wash fusible tearaway stabilizer – available for purchase from the teacher. ($4.00/yard)
You can order stabilizer and Ombre fabrics here:
Floriani Stitch-n-Wash Fusible Stabilizer =
https://www.aquiltingstitchuation.shop/shop/c/p/FSWF1510-Floriani-Stitch-N-Wash-Fusible-15x10yds-x37264016.htm
11216 307 Gelato Ombre = https://www.aquiltingstitchuation.shop/shop/c/p/11216-307-Gelato-Ombre-x38004436.htm
Other ombre fabrics can be found on Etsy. Maywood Fabrics also has nice gradations.
A few bucks to cover enlarging and printing your pattern. Hopefully there is a printer onsite that I can use to print your patterns. If doesn’t work out we will need to go to a copy shop to resize.
THE THREAD’S THE THING
Kevin Womack
Equipment: (put your name on everything if you can)
Threads: a variety of different cotton and/or polyester 50 wt. and/or 40 wt. threads in solid colors. Be sure to cover a range of warm and cool colors and light, medium and dark values. Also bring black, white and gray thread.
Organ or Madeira brand anti glue needles.
Sewing machine with power cord, foot pedal and manual in case there is trouble. Make sure it is a machine that you can operate free-motion style and bring a free-motion or darning foot.
An extension table for your sewing machine (HIGHLY recommended).
An extension cord or power strip.
Basic sewing kit including scissors, pins, seam ripper, extra needles, bobbins, etc.
Rotary Cutter, Mat (at least 18”x24”) and a square ruler that measures at least 3”, but can be up to 6.5” square.
Spray adhesive or basting spray – KK 2000 recommended.
A sketchbook and pens/pencils/marking tools.
An air-erasable or water-erasable fabric marker.
3 or 4 fat quarters in solid colors that you like (or fabrics that read as solid).
A minimum of 11 fabric rectangles (3”x18”) from a variety of solid colors (or fabrics that read as solid).
Prepared sandwiches for stitching (see Pre-class preparation notes below).
Optional:
A sandwiched quilt that you are ready to work on – no larger than 60”x60”.
24” rotary cutting ruler, at least 3” wide.
Two new glue sticks (if you don’t want to fuse or spray baste).
A small color wheel (I will have some available for $5 purchase in class.).
Your walking foot if you might want to stitch with it.
A portable table lamp (e.g. Ott light).
Pre-class preparation:
2 yards of black fabric and 2 yards of white fabric, cut into fat quarters (18”x22”).
8 pieces of batting, 18”x22” (your choice of loft and batting content).
Lightly spray baste (or fuse) 4 sets of these to make 4 sandwiches with white on one side and black on the other. You will have choices to make in class, so bring the balance of these materials and your spray baste or fusible to prepare more sandwiches in class.
NOTE: You will have the option of starting to quilt a small to medium-sized work (no larger than 60”x 60”) the last couple of days of class. If you would rather continue exploring color and stitch with samples, please cut 3 yards of black fabric and 3 yards of white fabric into fat quarters and cut 12 pieces of batting. Make 4 sandwiches before class and bring the balance of materials to make the other sandwiches in class. Also bring a few more solid color fat quarters.
Email me at KWomackArt@gmail.com if you have
questions.
©Kevin Womack 2024
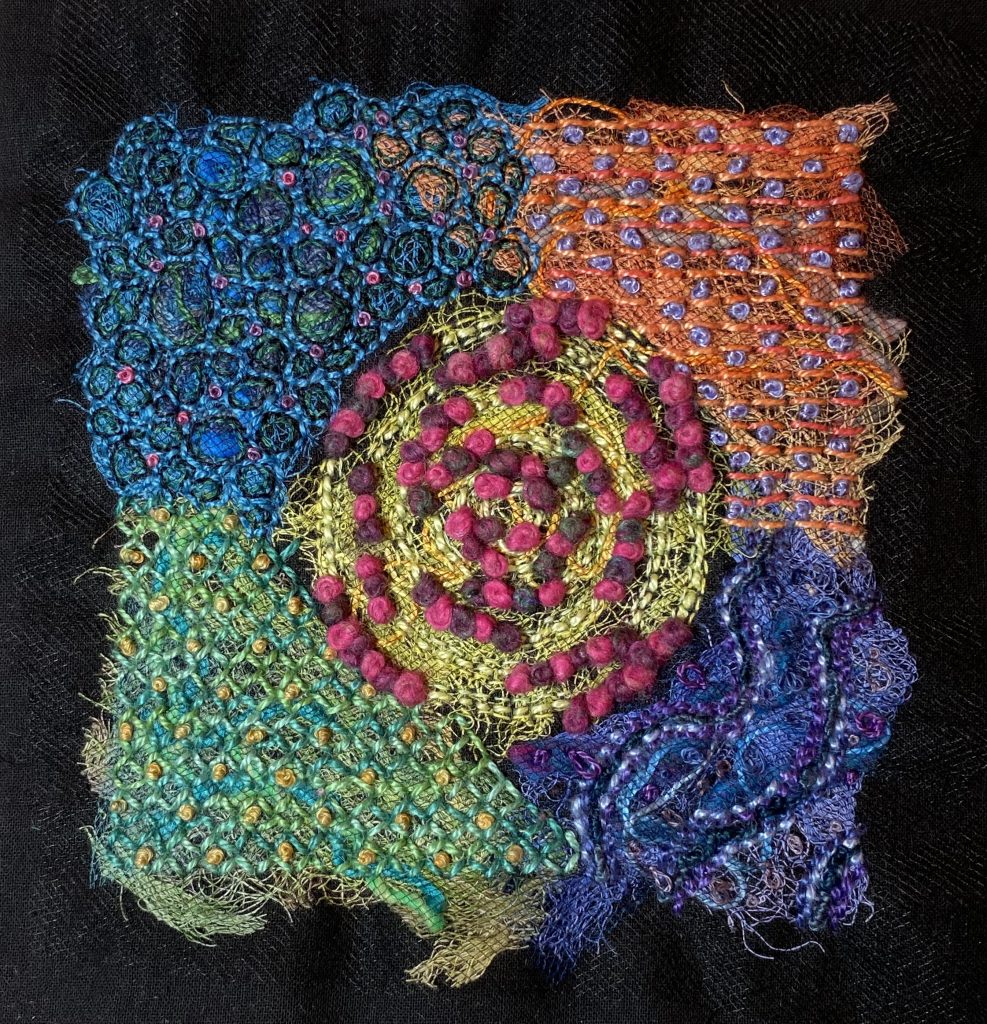
STITCH PLAY
Julie Booth
Equipment: (put your name on everything if you can)
Base Fabric: Cotton, linen, or cotton-linen blend (Essex): White/light neutral = ½ yard
Black/dark neutral = ½ yard.
We will be cutting most of this fabric into 6” squares so if you have smaller pieces in different light or dark neutrals (versus a full half yard) you can put together a variety.
Stabilizer Fabric: I suggest a soft stabilizer for easy stitching. Some choices: Wool blend felt, cotton flannel, a soft linen, wool felt, wool fabric, thin cotton batting. ¾-1 yard total. Again, we will be cutting most of this into 6” squares. You will attach one stabilizer square to each base fabric square.
Threads: Pearl cotton threads in sizes 12 and 8 in black, white, neutrals. Also, in your choice of size 12 or 8: a small assortment of your choice of colors (I suggest including variegated threads). Sewing thread for basting and stitching. Optional in your color choice: Embroidery floss (some skeins will be provided in your kit), wool, metallic, silk, linen, thin ribbon.
Needles: Your choice. (I will be providing a needle packet in your kit)
Pins: Your choice.
Removable Fabric Marker/Pencil: Suggest you have one you can see on light color fabrics and one for dark fabrics. I like Frixion pens removable by heat for light color fabrics.
Black Permanent Marker: Fine weight for writing on some samplers and for journaling. Examples: Micron Pigma, Faber-Castell Pitt, Fine Sharpie.
Optional: Color pencils, color markers, permanent fabric markers in colors for journaling and coloring fabric.
Journal/Notebook/Sketchbook: Choose something that you’re comfortable writing and sketching in. It does NOT need to be fancy or expensive. It will be the place where you’ll take notes, sketch designs and stitch variations, consider what you’ve stitched and directions you wish to take.
Scissors: Fabric and embroidery (small, sharp)
Rotary Cutter/ Self-healing Cutting Mat: Bring if you have.
Clear Gridded Ruler: Bring what you have. If you need to purchase: It should be at least 9” long.
Create a 6” square cardstock template with a centered 4” square window.
(1) sheet of white printer paper (8.5” x 11”)
Optional:
Task light
Yarns
Assortment of textural scraps and sheers including tulle and painted cheesecloth
Needle packet with two needles each of Crewel Embroidery sizes 3 and 5 and one Chenille size 22.
Dice
Twenty Twenty-Five
sstevenson@ucmo.edu